Zeta FX-61 Phantom Wing
| |
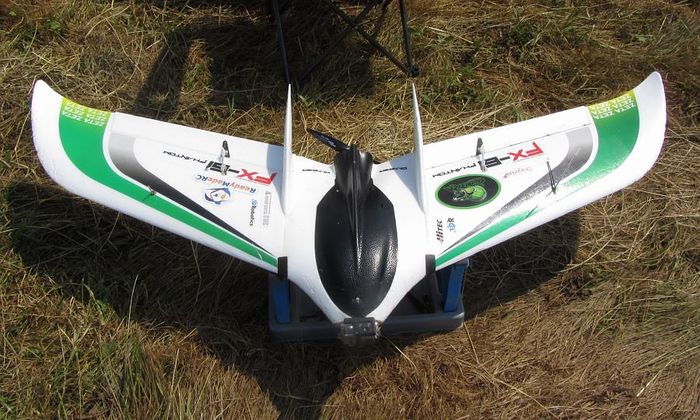
| Complete with character scars! |
Introduction - Phantom FX-61
After getting the Popwing up and flying well I decided to get into an air-frame designed to carry more weight and with enough room to accommodate all the FPV gear. I selected the Phantom over the Chimera or the TBS Zephyr ZII because it was available from the local HK warehouse, it has a very decent price and the reviews are great. This wing is made from HD EPO foam which is quite stiff and durable. It comes as either a kit or an ARF with motor, servos and ESC. I did a pile of reading and research on all the normal Forums before starting the build. What I came up with is shown here.
General Specifications
Distributor - BangGood USA
Aircraft - Zeta Phantom FX-61 FPV wing
Build Date - October, 2014
| Airframe Type - | Wing - FPV Specialist | Flying Type - | Powered FPV Glider | |
| Wingspan - | 61 inches (1550mm) | Length - | 27 inches (683mm) | |
| Wing Area - | 4.74 ft^2 (44dm^2) | All-Up Weight (est) - | 77oz (2180g) | |
| Motor - | Cobra 2820/88-1170kv | Wing Load - | 16.24 oz/ft^2 (49g/dm^2) | |
| Propeller - | 9.5 x 6 Aeronaut Folder | Max Power - | 555 watts | |
| Static Thrust - | 71oz (2023g) @ 2550ft ASL | Static Thrust/Weight (est) - | 0.93 | |
| Battery Type - | 4S4P Lipo | Capacity - | 11,600mah/10C | |
| In flight efficiency - | 160 - 200mA/mile | Flight Time - | >100 minutes |
Wings
I started with the wings setting up the GPS, VTx, folding dipole antenna and two servos. All the gear came out of the Popwing which is now "resting".
The servos are Hitec HS82MG which I cut to fit the original servo cut-out. I then opened a hole above the servos to pass the servo arm through the wing for top wing elevon control. I don't know why wing makers keep mounting servos and their linkage on the bottom of a wing that contacts the ground!
Both wings are laminated with 3mil film and (eventually) glued to the center section.
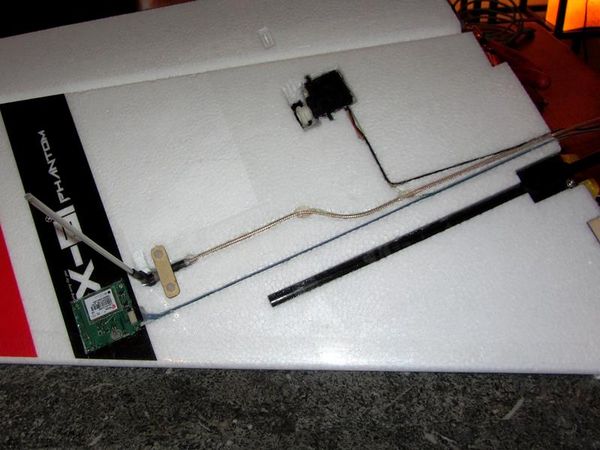
|
| Left wing detail with folding dipole and GPS antenna |
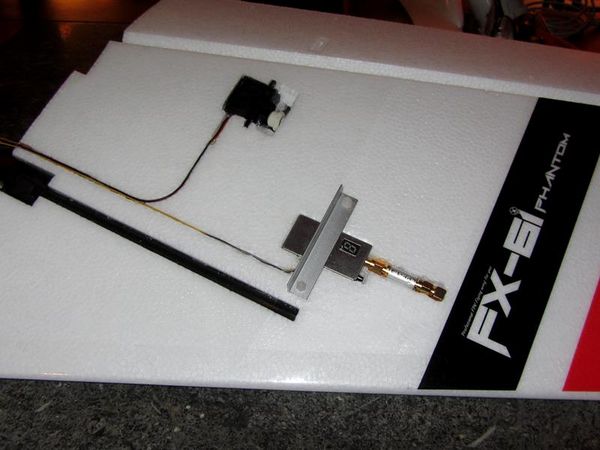
|
| Right wing detail with VTx |
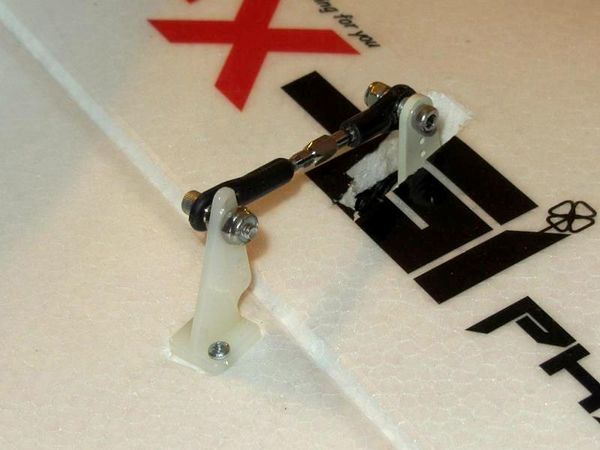
|
| Servo linkage detail |
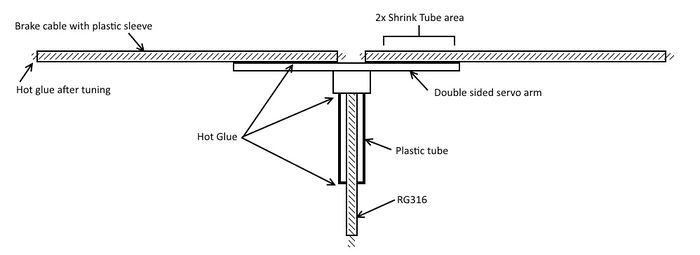
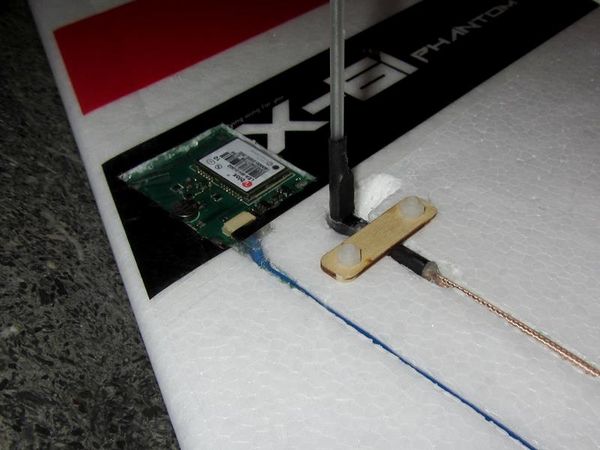
The folding dipole was made from bicycle brake cable, plastic tube and a double sided servo arm. The whole thing is then glued together using hot glue and shrink tubed for strength. A piece of plywood was then cut to hold it all in a cut-out in the foam which allows it to rotate back on landing.
|
| Folding dipole construction |
|
| Folding Dipole Antenna and Ublox GPS |
Fuselage
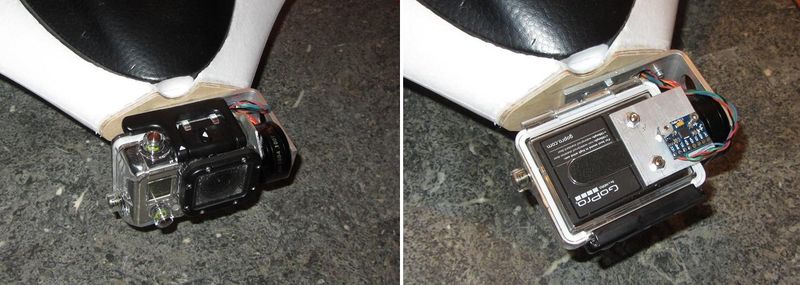
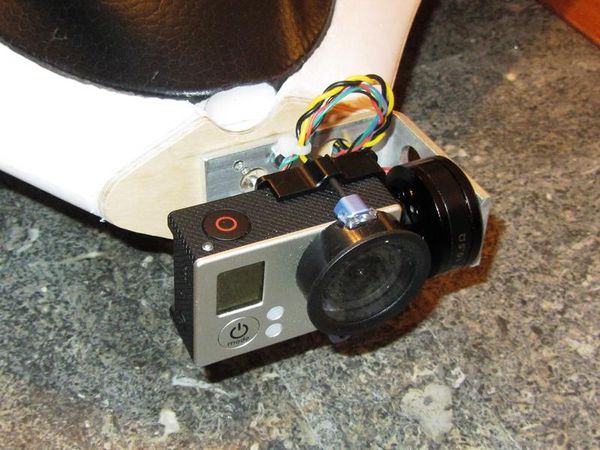
On the fuse I started with the nose. The PopWing had the camera mounted in the nose and I really like the compactness and the fact it doesn't cause too much drag in this location. For the Phantom I decided to go one step up and added a single axis brushless gimbal so it would stabilize pitch and give me pitch control so I can look down. I am using an Alexmos controller set-up with follow mode so the camera follows the angle of the airframe rather than staying dead straight no mater what the airframe is doing as seen on many multi-rotor set-ups. I also have a switch set up to lock it centered but still stabilized, so I can relax.
I built two versions of this idea first with the GoPro case and second with a Tarot camera holder. The difference, besides protection, is the GoPro case weighs about 80gr more than the Tarot set-up so I ended up using the Tarot because I was able to balance the plane more easily.
|
| Brushless set-up built with GoPro housing |
|
| Brushless Gimbal set-up with Tarot housing |
Motors and Motor Mount
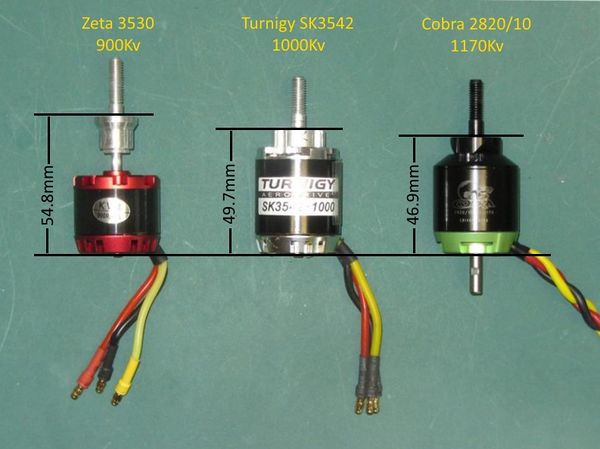
Here are two comparison photos of two motors I will fly, the Turnigy SK3542/1000Kv and the Cobra 2820/10 1170Kv. Because the motors are shorter than the stock motor, I will use aluminum stand-offs of 10mm to get the prop away from the trailing edge of the wing. The gap from the prop tips will be between 3/4" (19mm) and 7/8" (22mm).
|
| Stock prop length vs. Turnigy and Cobra |
|
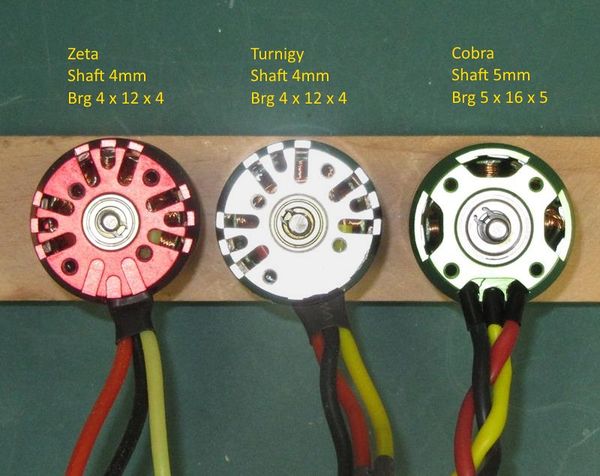
| Rear bearing difference! |
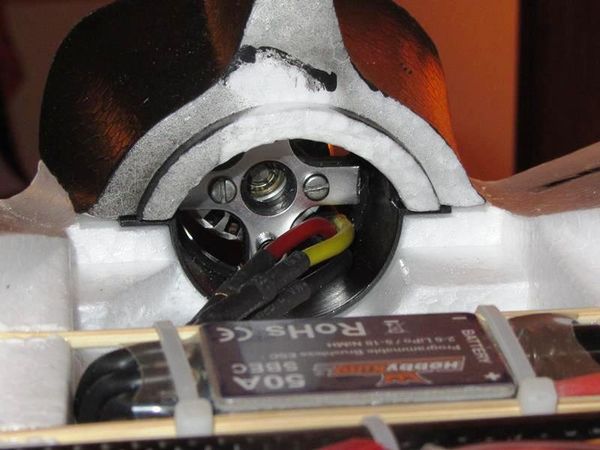
The motor mount needs some help especially if you are going to upgrade the power. For this initial build I added an aluminum backing plate made from a Turnigy cross mount. I have a more powerful Cobra 2820 and will likely get an aluminum replacement CNC'd for it.
|
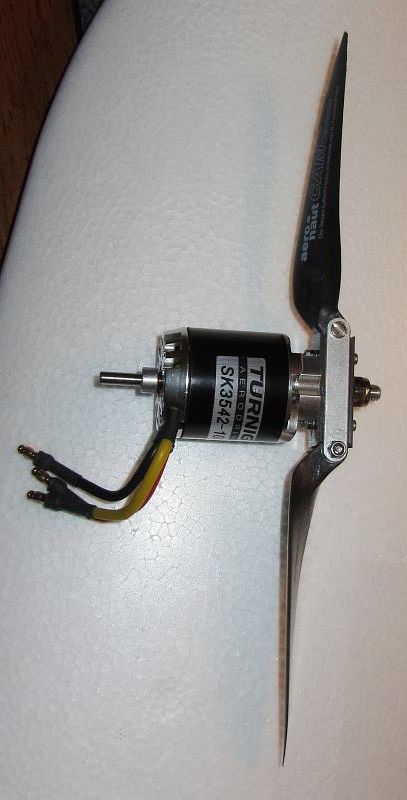
| Motor with Aeronaut Cam Carbom folder |
|
| Motor mount reinforcement |
Because I am not using a collet prop adapter, the motor and prop sit closer to the back of the wing. To alleviate this I added tube stand-offs to the back of the motor to space it out so I have at least 3/4" clearance between the prop tips and the wing.
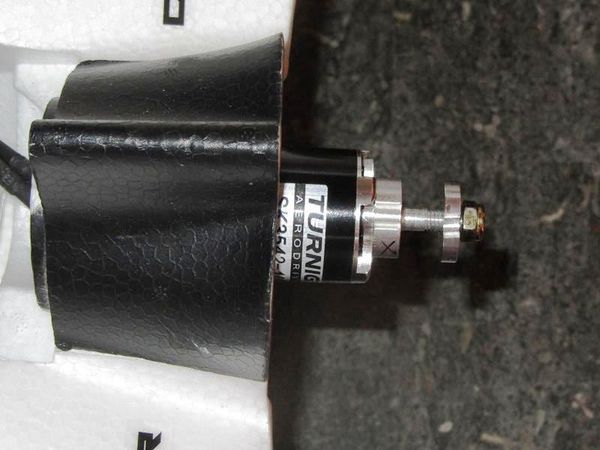
|
| Motor outreach |
New Motor Mount
The one well known weakness in the FX-61 is the motor mount. After reading many accounts of this piece braking in relatively light weight hits and because I broke the mount on the third flight, I decided to get an aluminum replacement made.
To get the piece made, I first threw together a 3D CAD model with relatively close dimensions based on what I could measure and sent it to the awesome folks at SmallPartsCNC.com. They were interested in the possibility of making it a standard part in their online catalog so they very quickly ordered an FX-61 kit to get the dimensions from a new, unused (or broken) part.

|
Within a couple weeks they had a first short run done and below is one of the first pieces. In my original design request I added 10mm to the length of the original mount to accomodate shorter than stock motors as well as getting the prop spacing better for folding props and noise.
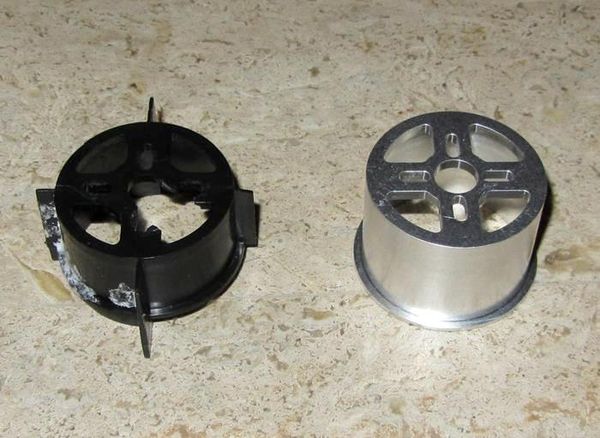
|
| Plastic (stock) vs. longer Aluminum piece |
To attach it and fill in the chunked up foam where I cut the old piece out I mixed up some 30 minute epoxy with a fair amount of chopped fiberglass for filler and some added strength. Micro Balloons would work well here too as would 5 minute epoxy. I like the 30 minute because of the longer working time it alows.
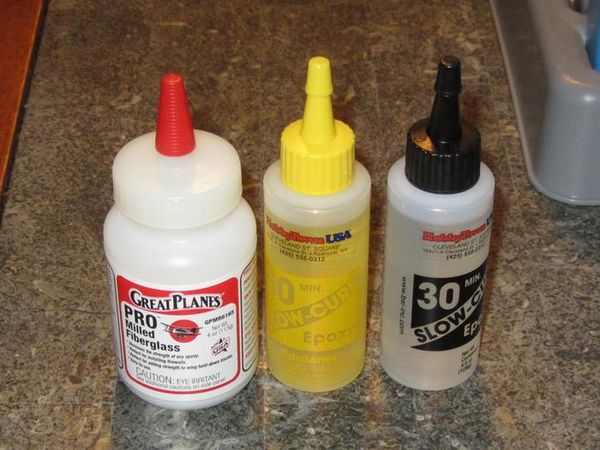
|
| Filler and Glue used |
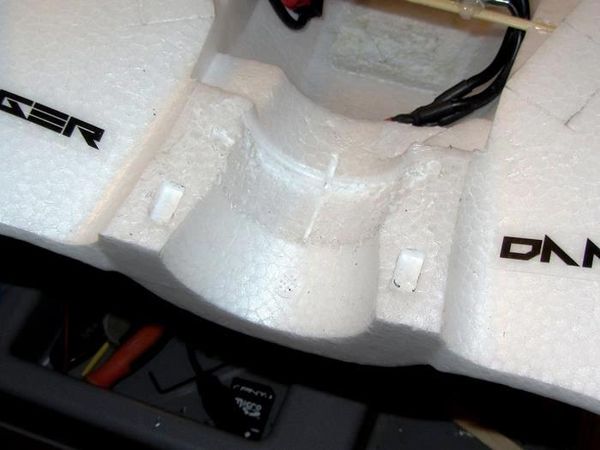
|
| The mount saddle after removal of the plastic mount |
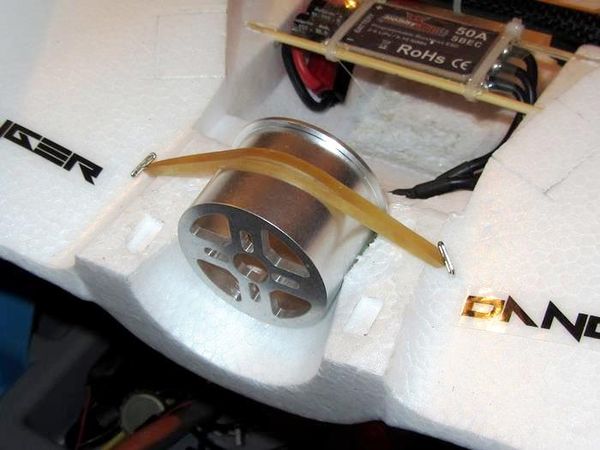
|
| Glueing the bottom half |
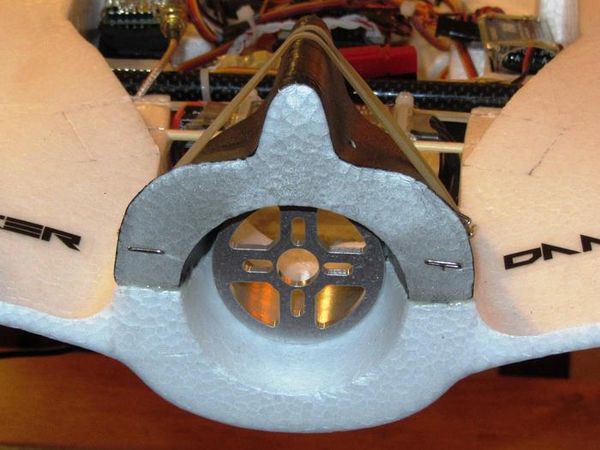
|
| Glueing the top half |
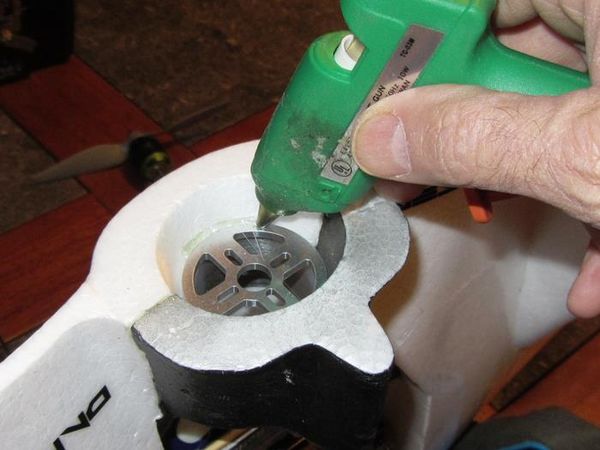
|
| Insurance hot glue bead! |
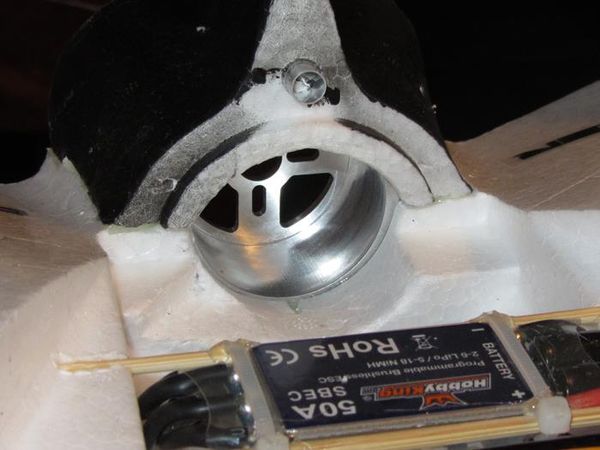
|
| View from the front |
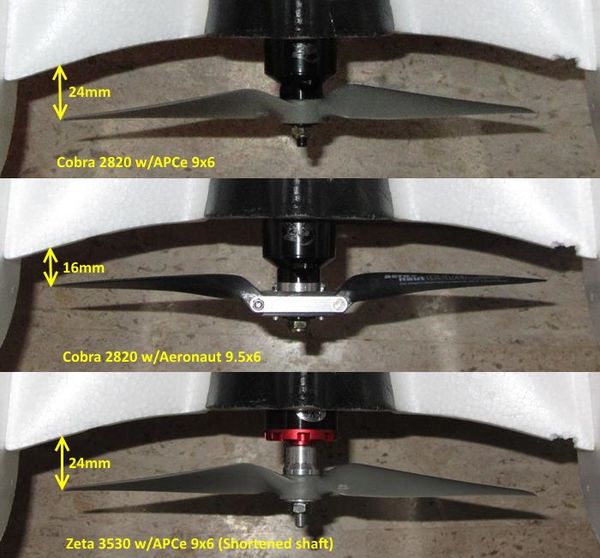
|
| Prop offset with Cobra and Zeta (stock) motors |
Motor/Prop Test Results
This table shows two motors from Zeta and Turnigy and three different props. It should be pretty clear the stock motor and prop combo are very low performance. NOTE: There was significant motor vibration with the stock motor due to the motor shaft length. After cutting it down by ~6mm, most of the vibration was gone but a bolt on prop adapter should be considered.

|
| Zeta 3530 vs. Turnigy SK3542 test results (corrected) |
This chart shows the Cobra 2820/10 motor tested at 100% and 50% with both the Aeronaut and APCe props. NOTE: This chart was corrected on December 7, 2014 for a wrong pitch value and calculated pitch speed. This affected the Aeronaut prop only.

|
| Cobra motor results on 4S |
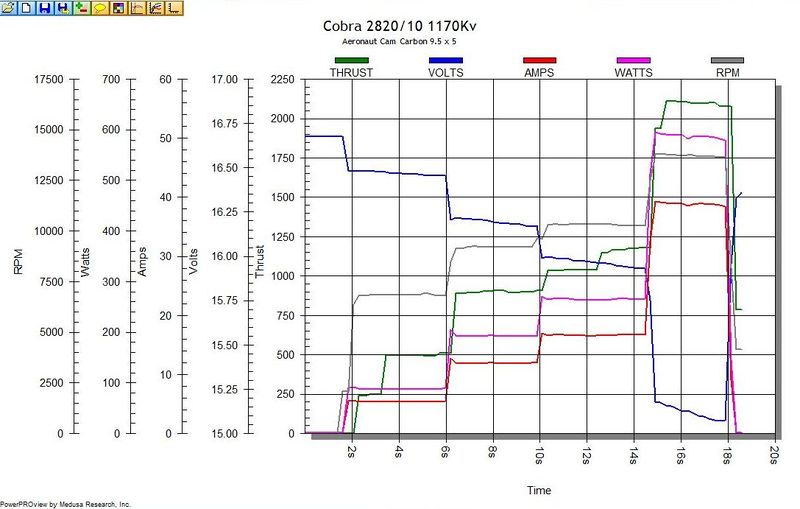
|
| Cobra graphed results |
Component Layout
The component layout is always a fun puzzle that seems to continually change over time. What is pictured then is my first puzzle solution!
I really like setting up with the battery CG at or very near the plane CG. This makes it very easy to swap battery pack sizes without having to add, subtract or move weight around for balance. It also makes it very easy to adjust the CG by moving the pack a small amount fore or aft.
The first picture shows the APM 2.5, ORX LRS receiver, MinimOSD, SBEC for APM power, VTx 460mAh battery, 50A ESC, APM power module and a 4000mAh, 4S zippy compact flight battery. At some point I might make a bottom hatch so i can add a second 4000mAh pack. The second picture shows the lid with the brushless gimbal controller and its battery mounted.
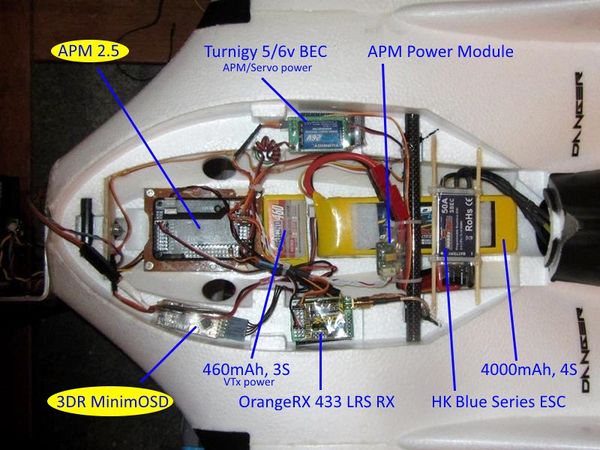
|
| Component layout |
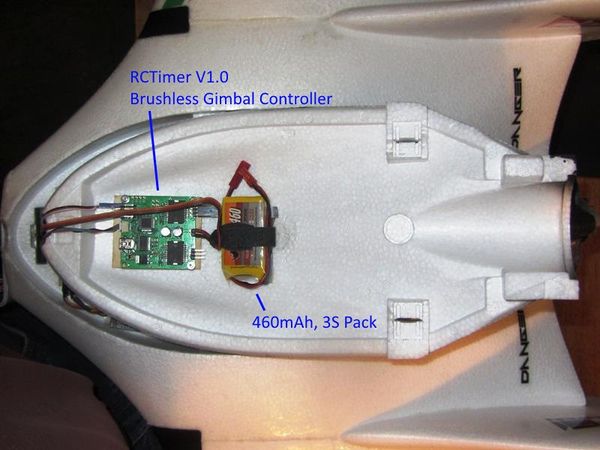
|
| Gimbal controller and battery |
Modification Parts Used
- Cobra 2820/10-1170Kv Brushless Outrunner (replaces the Turnigy 3542/1000)
- Aeronaut CamCarbon 9.5 x 6 folder set
- 0.057" x .185" CF flat stock
- 4S/4000mah/35C Zippy compact Pack
- Turnigy Blue Series 50A ESC
- Hitec HS82MG servos
- Nylon T-Style control horns and Titanium Pushrods
- McMaster Carr G10 Fiber glass sheet
- ReadyMadeRC.com 400mw/1258mHz VTx
Future pieces
- Dimension Engineering 25w adjustable voltage regulator
- 5200mAh/4S or 5200mAh/3S x 2
Maiden Day!
November 7, 2014 - This wing fly's incredibly well.
First launch was a low power skimmer(!). I then adjusted the max throttle to 100% and the second launch and first flight were outstanding. Flew about ten minutes adjusting trim on manual and stability. On the second flight, I made a bit of an error in judgement on my CG location and stalled it too low to the ground causing a blackberry deep dive landing! UNFORTUNATELY there is nothing on the GoPro memory card (for any of the three flights)! On the third flight (yes it still flies after the deep dive!) I dialed in the CG and finished the trim adjustment however it was flying a bit strangely and getting noisy. Turns out the famous break-away motor mount, well, broke away.
Guess I better hurry up the aluminum mount development!
Gotta say, it flies like a dream compared to the PopWing, solid and stable. Absolutely no flutter and considerably more smooth due to the much stiffer EPO foam.
Todays specs:
- Maiden All-Up-Weight - 64oz
- Maiden motor - SK3542/1000 (I'll mount the Cobra when I get the new mount)
- CG location Maiden start - center of spar
- CG location after adjust - Forward of spar 1/4" (6mm) I will try this at 1/8" (3mm) when I get the new motor mount.
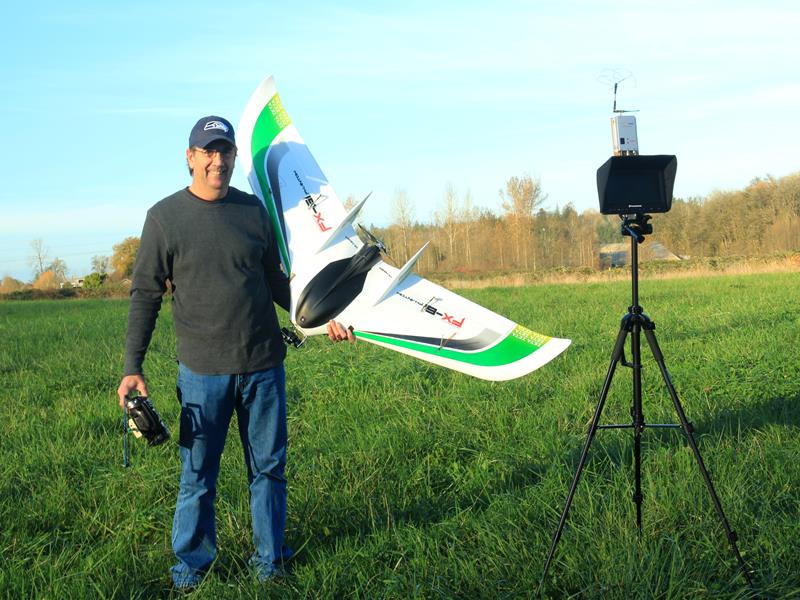
|
| Ready! |
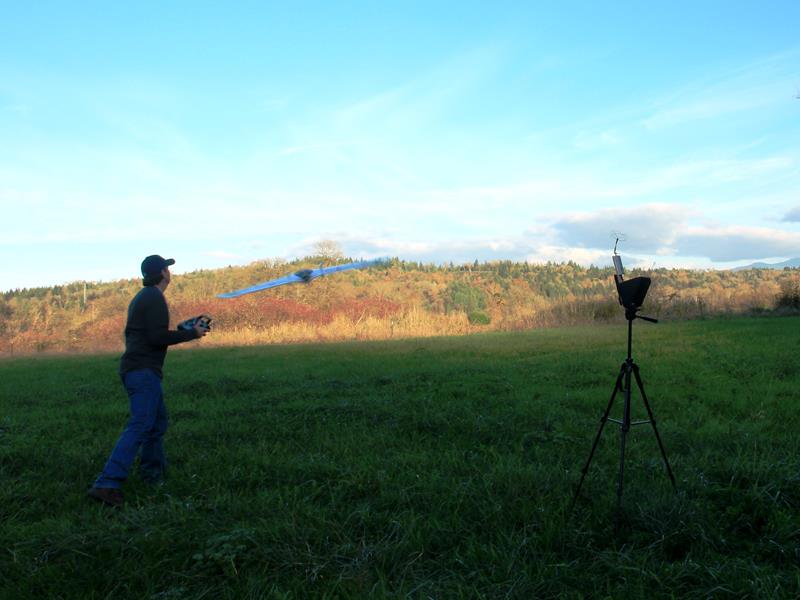
|
| Launch! |
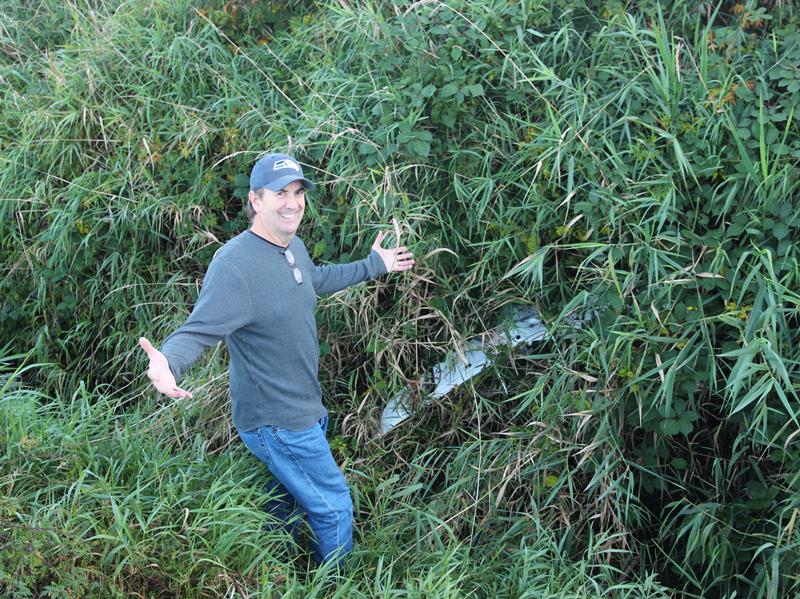
|
| Every picture has a story... |
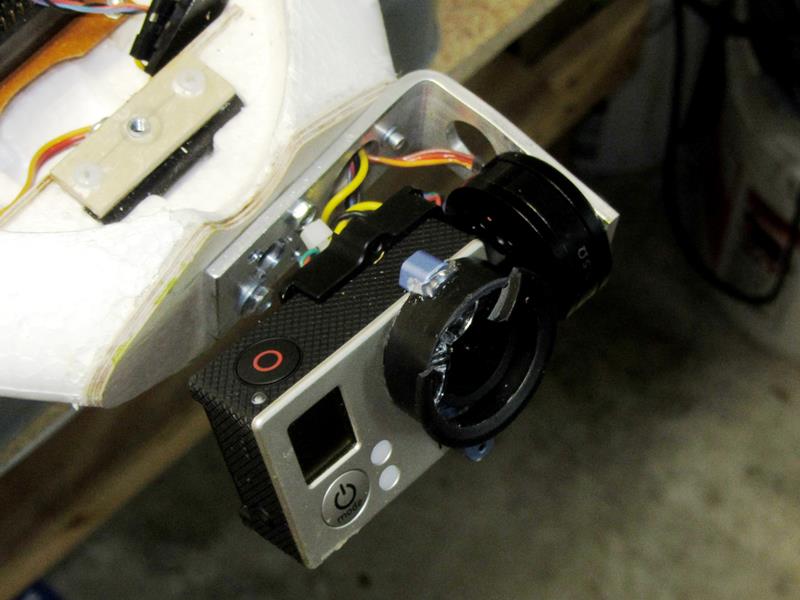
|
| Glad I use "protection"...:) |
A Short Bit of Testing
|
Near Carnation, Washington - February 2015 |
Further Development (Mods)
Control Horns
I can't stand the cheap control horns these types of kits come with so I generally change to Dubro bits to make them stronger. On the FX what's even worse is the thickness and density of the Elevon EPO foam. Every few flights I had to work on the control horns because they would loosen up. I finally decided to back them up by using a cut down Hobby King 50mm CF servo horn. This makes it much more durable and takes nearly all the flex out.
Elevon Hinges
I finally tore an elevon off on landing (as many others have) and decided to use Robart pin hinges as I have done on several other foamies. I simply makes a jig to guide a hot wire for making the pin hinge hole straight and through the fat part of the elevon and glue them in with medium CA. Hinging this way is much smoother and straighter than tape, glue or blade hinges.
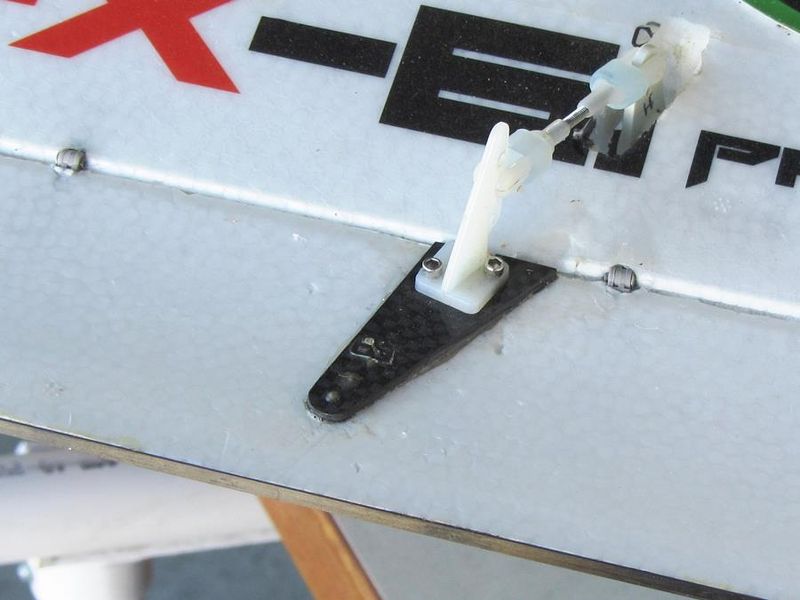
|
| Strong control horns, better hinges and a CF strip to stiffen the elevon! |
New 11,600mAh/4S pack (July 2015)
Latest lay-out! I've added a new Sepic voltage regulator to power the VTX (cleanly) and built a new Panasonic 18650PF, 11,600mAh/4S pack to get a bit more air-time. All-Up-Weight (AUW) is now 2190g (77oz).
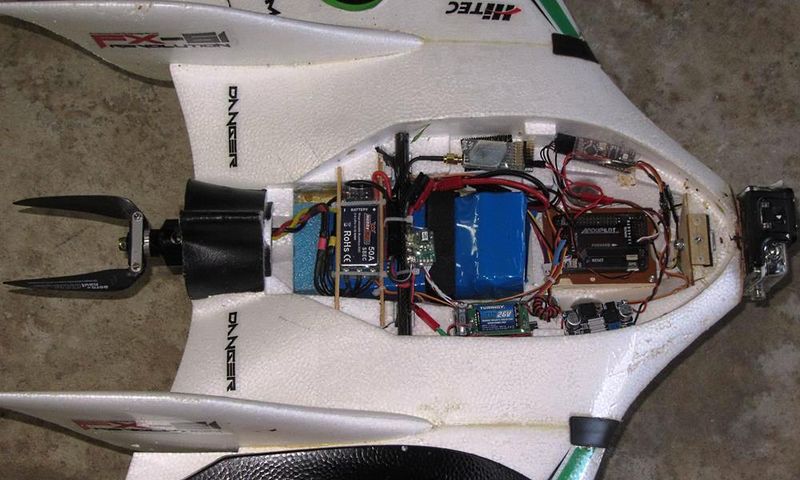
|
| Layout with new Panasonic 4S pack |
See Also
Some Vendors used for this Project
Comments? Questions?