PopWing 1300 FPV Wing
Contents |
|
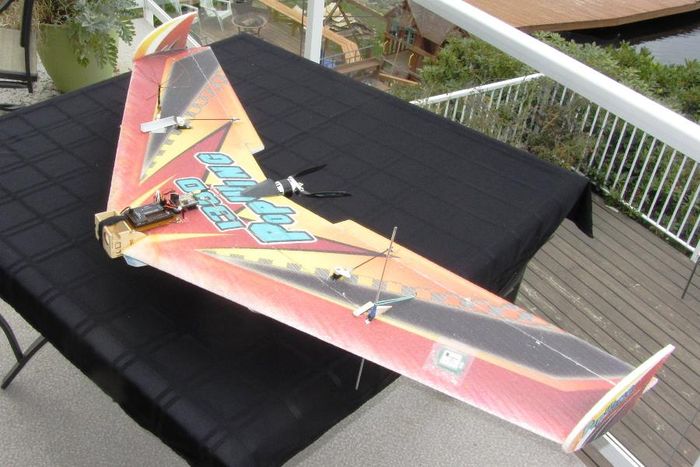
| Current build with fold-up Dipole antenna, OrangeRx LRS radio and 1.3Ghz VTx |
Introduction - PopWing 1300
I've wanted an FPV wing since the first time I saw a Team BlackSheep video. I think it should be a perfect platform for exciting video because of the performance of a wing in general and the fact the camera is right in the nose and power is via pusher. So, when I saw a 48hour sale on this 51" wing from CommonSenseRC I decided to give it a try. So far...So good!
Build!
Completed 15 March, 2014
I recieved the kit in 3 days and immediately went to work. as far as initial build, I followed the directions building it up completely stock with the motor supplied (2216/1400) so I would have a good starting point to understand where the CG should be. I never flew the wing built with the stock pieces so I can't really comment on it in this configuration. Once built, I then made some modifications for more power to deal with the added weight of a GoPro, VTx set-up, strength and a larger pack.
Motor Upgrade
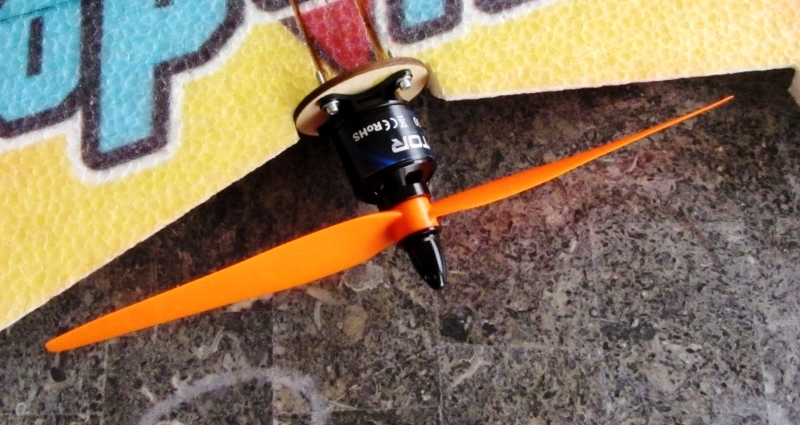
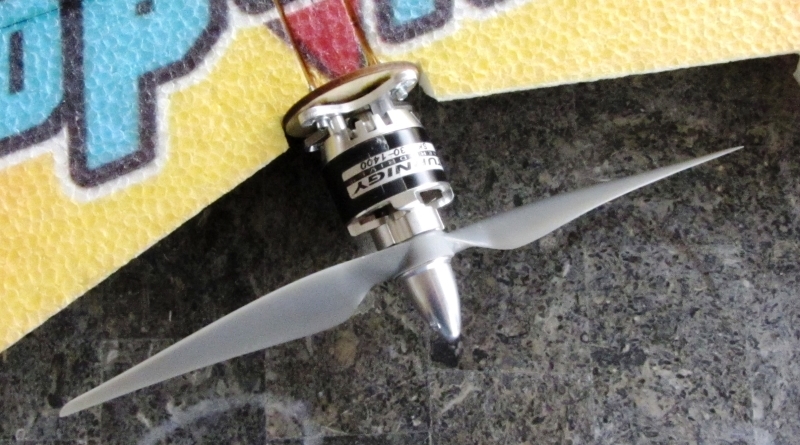
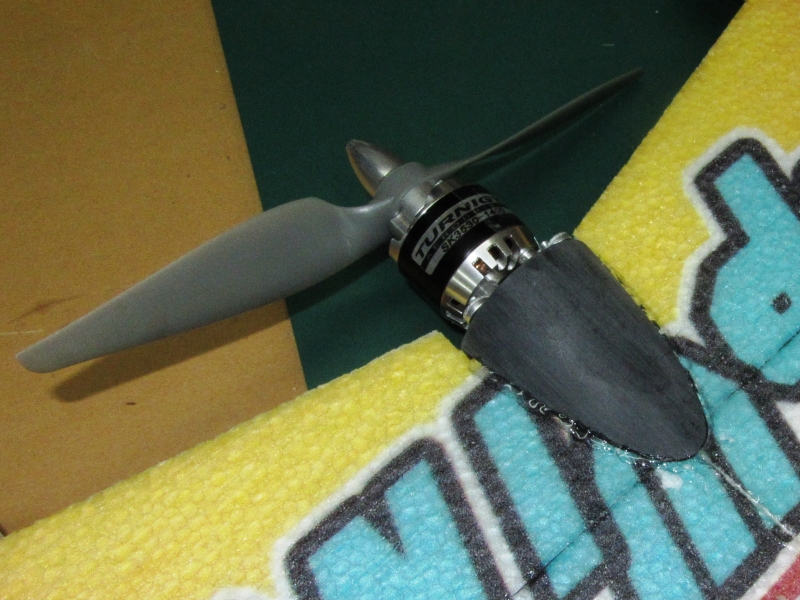
Because I knew I would be adding anywhere from 10oz (280gr) to 16oz (454gr) of weight with the GoPro, VTx, larger pack and strengthening bits, I elected to up-size the motor. I happen to have in "the Motor drawer" an old Turnigy_SK3530-1400 (EQ to a 2815 size) which used to power my Penguin and this looked perfect for this set up. I was expecting an all up weight of between 29oz(822gr) and 35oz(992gr) so for good performance the thrust should be equal to or higher than the highest all up weight and the prop speed should exceed 60mph (100Kph). With a measured thrust of 44oz(1247gr) and a static prop speed of 61mph using an APCe9x6 prop, this motor fits the bill perfectly. NOTE: They no longer sell this exact motor at HK but they do sell an NTM3530/1400 which is basically equivalent.
|
| Original 2216 motor and HD9050 prop |
|
| Turnigy_SK3530-1400 motor and APCe9x6 prop |
Strength Mods
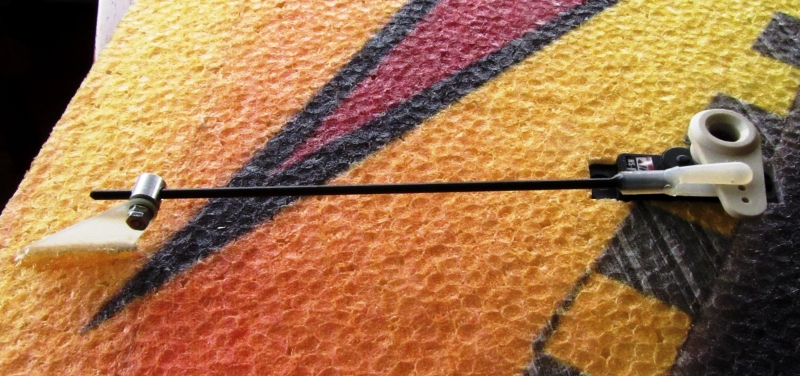
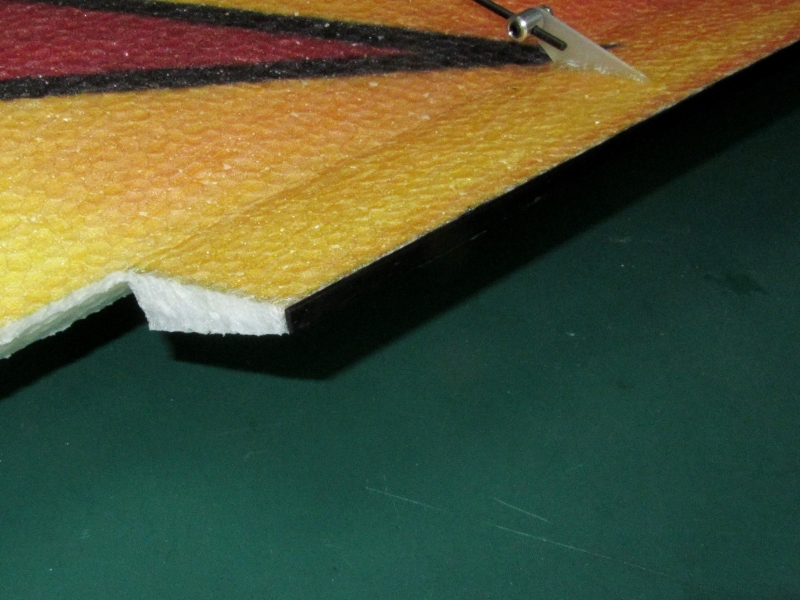
The first thing I did was scrap the supplied metal pushrods in favor of .072" Carbon Fiber rods which do not flex. I also glued the servos in with the control linkage on top to save them from any landing abuse. Additionally, I added CF strips to the trailing edge of the ailerons so the ailerons will keep their shape through the entire control surface throw. Lastly, I added a glued-on ABS cowl to the top of the motor mount as the stock mount is a little weak for the motor I selected.
NOTE: At the time of this writing, CommonSenseRC was suggesting a CSRC-645MG, full size 56gr servo which I believe is much too large for this size and weight aircraft. I elected to use a 20gr Hitec HS82MG which has proven itself quite well. You could also choose the CommonSenseRC CSRC-85MG servo which is a similar size.
|
| Top mounted servos with CF Pushrods |
|
| Strengthened Ailerons |
|
| Motor Mount Cowl |
Camera Mount
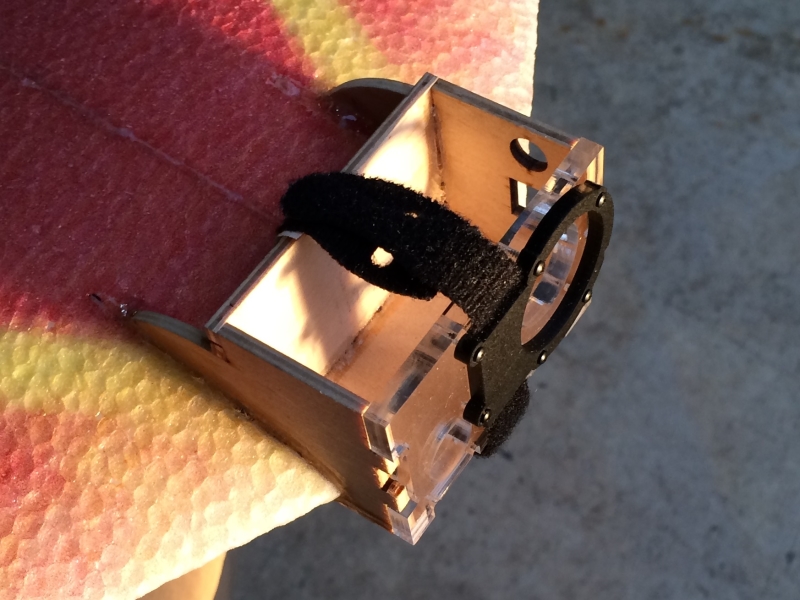
I already had an GetFPV.com GoPro2 box mount and layer lens which I bought for another project so I decided to cut this up to fit in the wing. I notched the nose for a tight fit and glued the box in so the bottom was parallel with the wing bottom. I slotted the foam for the layer lens strap and called it done!
|
| Camera Box Mount |
Battery
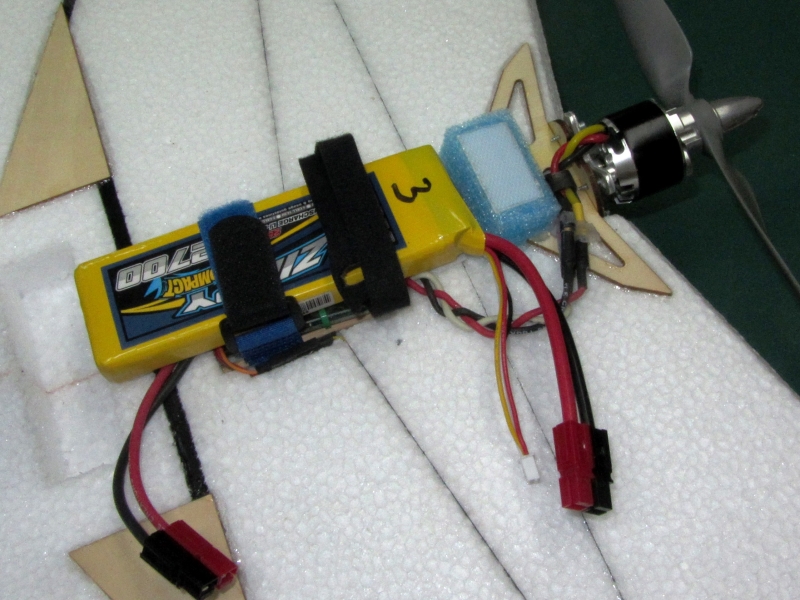
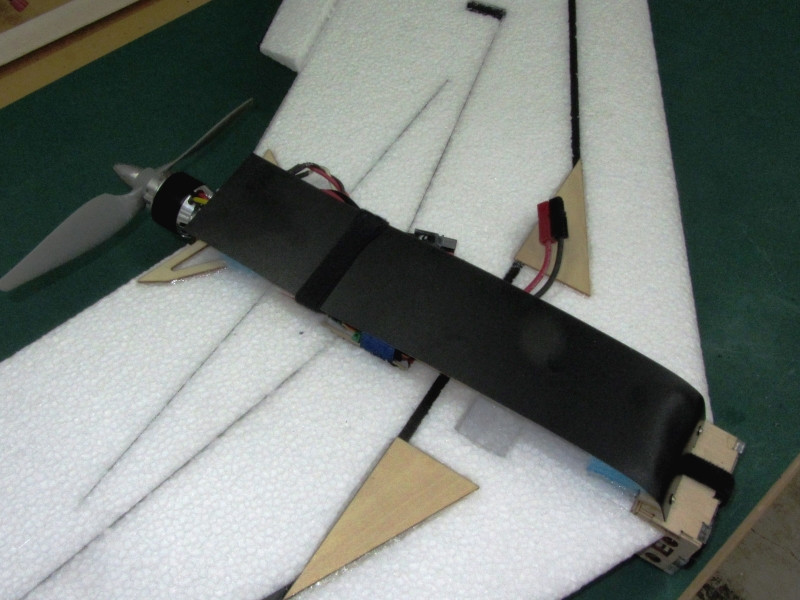
For a battery I already had both 2700mah/25C and 2700mah/35C packs in a 3S configuration so I set it up with one of these and positioned it to balance the plane at the original CG location. I then added some dense packing foam and a styrene panel to act as protection and a skid shield. The ESC, a CC Phoenix-45, and RX were mounted inside the pre-cut well under the battery.
|
| Battery mounting |
|
| Styrene Skid/Protection Shield |
FPV Gear
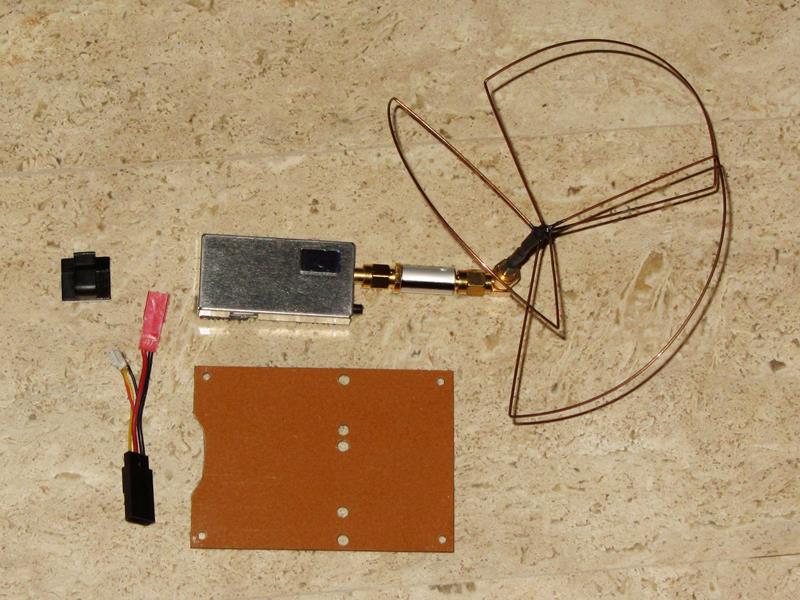
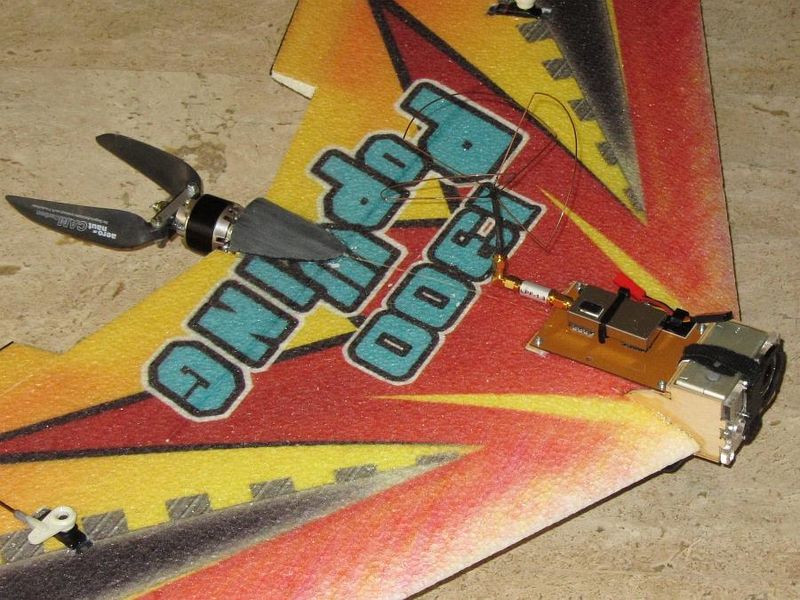
To get started (Phase 1) on this I will first mount a simple VTx wired directly to the GoPro. The mount plate is a cut and drilled piece of G10 with enough room to add an OSD at a later time. For power I am first connecting the VTx directly to the 3S flight battery but as I add more sophistication I will likely add a separate 800mah battery or a Dimension Engineering 25 watt adjustable voltage regulator.
|
| VTx, Low Pass Filter, 1.3GHz antenna, Mount plate and a power connector |
|
| Mounted up and ready to fly! |
Maiden
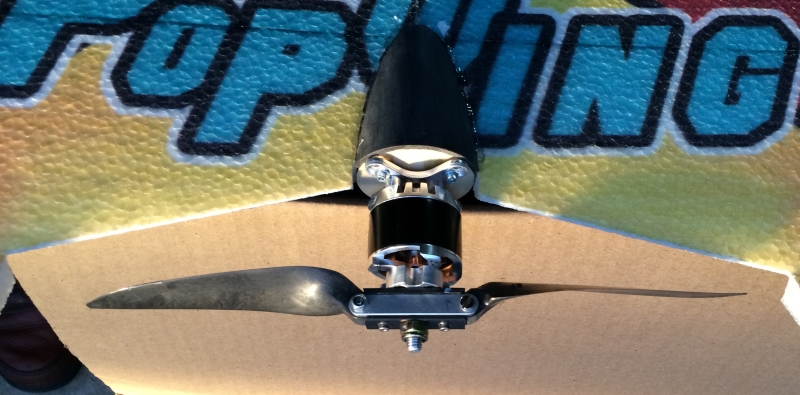
NICE! It flys very well with the added weight and I think it will be an awesome FPV platform once I build the last part in. It is pretty fast, has more than enough power to go verticle and flies slowly enough to get some quality gliding in (not to mention short landings). Below is a video of the third flight on Maiden day. It only needed a small amount of UP sub-trim to get it dialed in and the left handed frisbee throw gets it in the air very easily with about 3/4 throttle. I did break the 9x6 APCe prop on the last landing so I have replaced that with a 9.5x5.5 Aeronaut CamCarbon Folder.
|
| CamCarbon Folder |
| Select "HD" and crank up the sound! |
|
2 minutes of the 3rd Flight! |
Specifications
Modification Parts Used
- Turnigy NTM 3530/1400 Brushless Outrunner (2815 equivalent)
- Aeronaut CamCarbon 9.5 x 5.5 folder set
- 0.057" x .185" CF flat stock
- 0.072" CF rod
- 0.040" Sheet Styrene
- GetFPV.com Plywood GoPro2 Mount with Layer Lens
- 3S/2700mah/35C Zippy compact Pack
- CastleCreations.com Phoenix-45 ESC (discontinued)
- Hitec HS82MG servos
- McMaster Carr G10 Fiber sheet
- ReadyMadeRC.com 400mw/1300MHz VTx
The Numbers
- Wingspan - 51" (1300mm)
- Weights
- Stock AUW (measured) - 19oz(539gr)
- W/GoPro2 and & Lg Battery, AUW - 30oz(850gr)
- Phase1 FPV Gear, AUW - 33oz(936gr)
- Phase2 FPV with APM, LRS and separate VTx battery - 39.7oz(1125gr)
- Battery (as built) - 3S, 2700mah, 35C Zippy Compact
- Motor (as built) - Turnigy_SK3530-1400 Brushless Outrunner
- MAX Power - 470watts
- MAX Current - 28amps
- MAX Thrust with CamCarbon prop - 44oz(1247gr)
- MAX Prop speed - 59mph(95kph)
- Flight Time (observed) - 10 - 16 minutes
- Servos - Hitec HS82MG analog
- ESC - Castle Creations Phoenix-45 (discontinued)
- RX - OrangeRC 6 channel DSM2 with satelite
- VTx - ReadyMadeRC 400mW, 1300MHz Transmitter (US Version)
UPDATE!
Added
- APM 2.5 flight controller w/APM power module
- OrangeRX LRS radio gear
- - Using PPM out to the APM
- Minim OSD
- Ublox Neo6 GPS
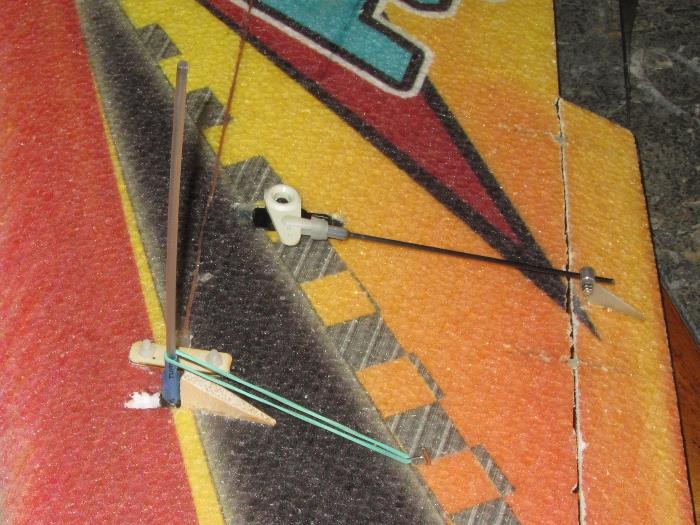
- Folding, verticle polarization Dipole antenna
- - Made from bicycle brake cable
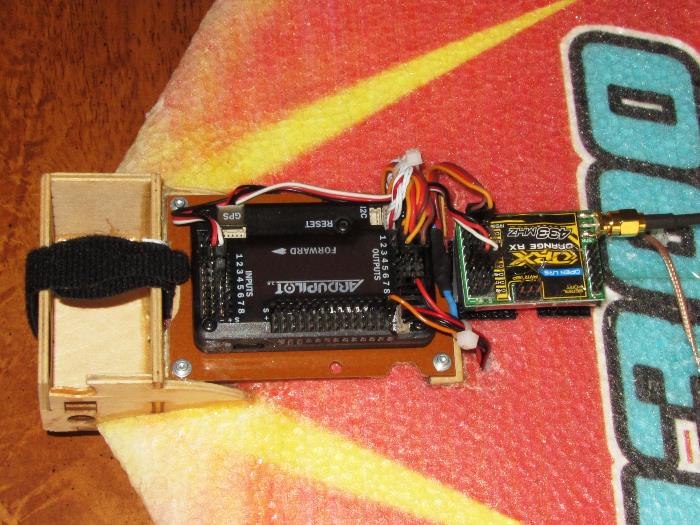
|
| APM 2.5 and OrangeRX LRS Receiver |
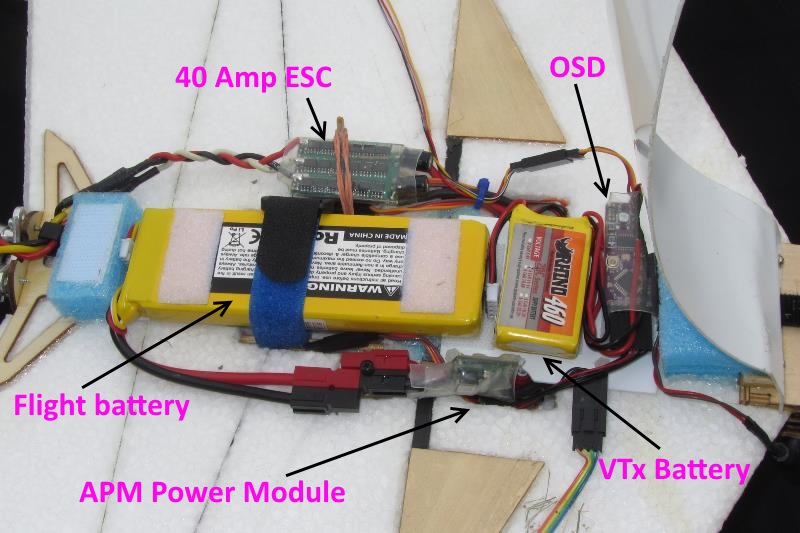
|
| Underside component layout |
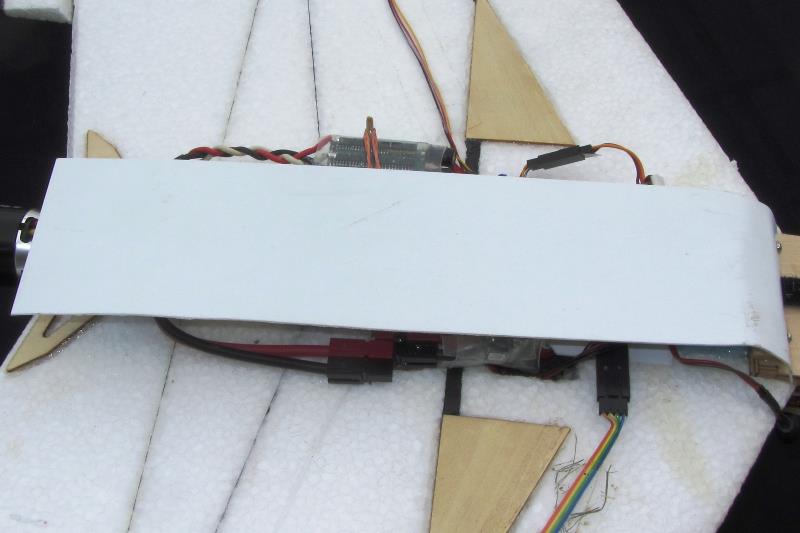
|
| Skid plate detail |
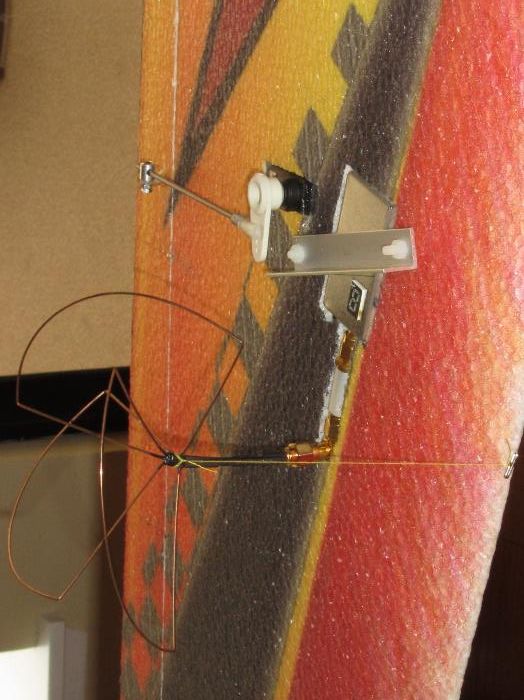
|
| New VTx location showing heatsink and kevlar string antenna support |
|
| Folding Dipole detail showing rubber band and balsa stop |
Recent Flights
After quite a few flights I can say it fly's OK. Not spectacular as it is a bit twitchy/bumpy and very sensitive to CG changes. Also at about 50mph there is some pretty extreme wing flutter that sometimes occurs. The reason for these characteristics can probably be attributed to the fact that it is now near 40oz (1125gr) which is 2.2 times the design weight.
As a test bed it is great. Inexpensive, tough and adequate in size and strength. Now that I have proven out the systems I want to use I will likely move up to either the HK Phantom FPV wing (1550mm) or the Ritewing Zephyr II (1425mm). Both of these are much stronger with far more wing area and are designed for the FPV components.
Stay tuned...
See Also
Some Vendors used for this Project
Comments? Questions?