How To - Set-Up a Pusher Style Folding Prop
| |
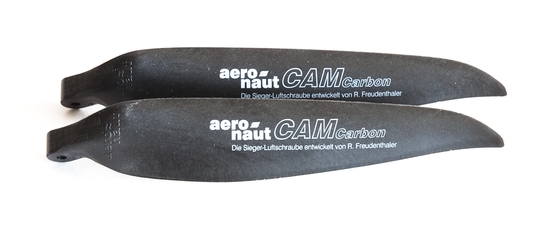
| Aeronaut! |
Introduction
On a couple of the threads I enjoy on RCGroups, many people have asked how to set-up a folding prop in a pusher configuration. In my case I only use Aeronaut components because they are very high quality pieces and the complete prop assemblies are always easy to balance.
Here are two US vendors for Aeronaut parts seen on this page:
If you are in Europe or can't find what you need at the above, these guys are great and have fast international shipping:
My Set-Ups
There are many ways to set up a folder using different components including a full spinner "in reverse". In my case I always use the same simple bare Aeronaut "Yoke" (which is the piece the blades are attached to). On my planes I have both shaft style motors and bolt on prop adapter style motors. Note: While I have seen some get successful results from a "reverse" spinner, I do NOT recommend it as it is difficult to set-up for vibration free running.
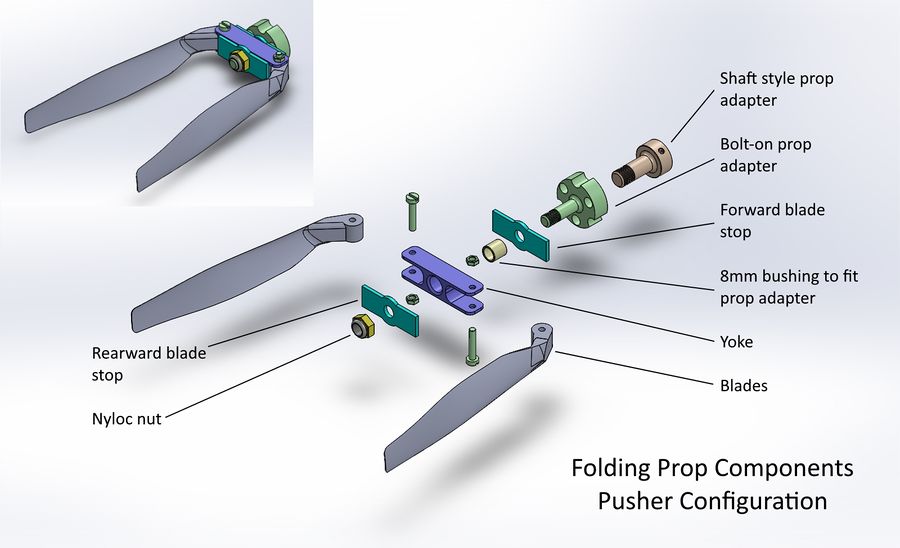
| Here is an image with most of my setup components with a bolt-on prop adapter and alternate shaft style (set-screw) adapter: |
|
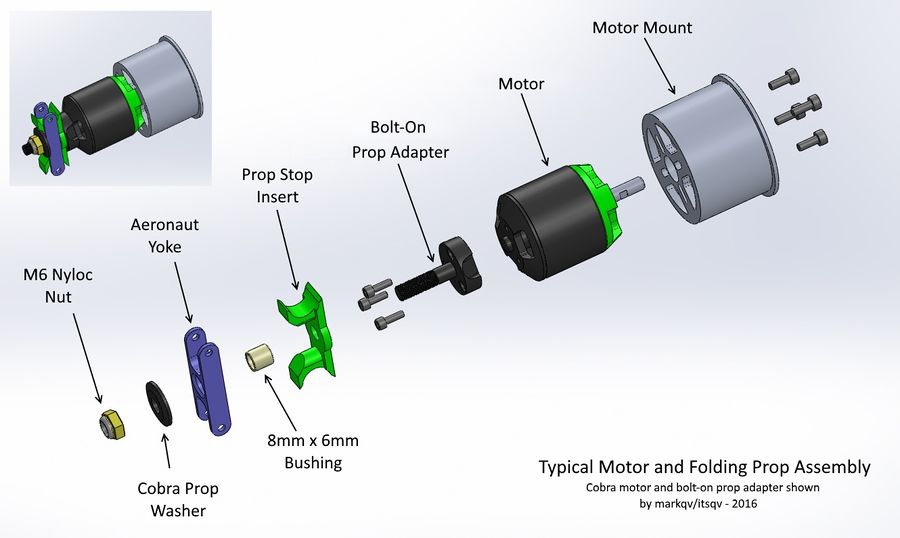
| Here is an image with most of my FX61 setup components showing my 3D printed prop stop insert (blades not shown): |
|
Prop Adapter
If your motor uses a bolt on prop adapter, it is important to measure the shaft diameter as you will need a bushing to size it up correctly for the Yoke mount hole. These bushings can be found online and one such vendor is GetFPV.com. Note: Make sure that if you do not use an Aeronaut yoke, you measure the ID of the center hole before buying the bushings.
US Supplier, GetFPV
UK Supplier, ElectricWingman
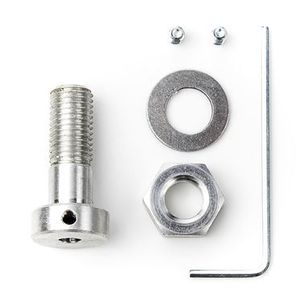
If your motor has a shaft which requires a collet or grub screw style adapter, I recommend either Aeronaut or Scorpion brand and the type with the grub (set) screws spin the truest. These are generally better in terms of straightness and machine quality. Here is the Aeronaut version. NOTE: The adapter must have an 8mm prop shaft to fit the Aeronaut Yoke.
|
| Grub or Set Screw style prop adapter (Aeronaut) |
The Yoke
On the Yoke, also known a the center piece, I use 38mm or 42mm sizes which is the distance between the blade pivot screws.
- US Supplier, EspritModels - 38/8mm Size Yoke
- UK Supplier, ElectricWingman - 38/8mm Size Yoke
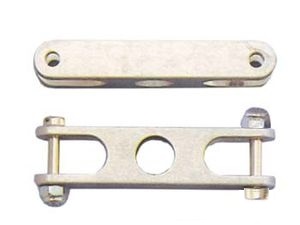
|
| Aeronaut Yoke |
Another option I found while putting this page together is the Hacker Aluminium Hub for folding Props.
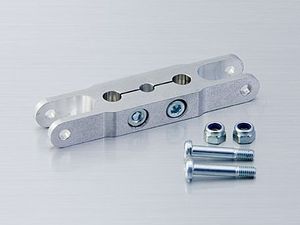
|
| Shaft style Hub/Yoke from Hacker |
These look very easy to set-up on a shaft style motor and because they are made by Hacker, should be fairly high quality. They show 43 sizes of this Yoke so finding one that fits should be a non issue. A 37mm x 8mm blade width x 6mm shaft size is listed for 12 Euro so the price isn't too bad especially considering it eliminates the need for a prop adapter!
The only place I have found them is directly from Hacker in Germany but might be worth a try...
Blade Stop Plate
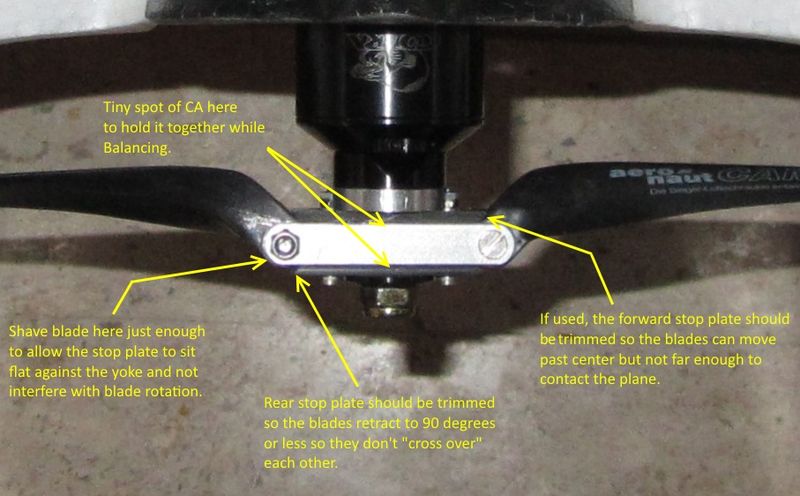
In a pusher set up it is important you use at least a rear stop plate to keep the blade tips from crossing. Normally, on a tractor set up, this is not required because the fuselage stops the blades from "over folding". If you don't include this simple piece, you stand the risk of having your motor-mount or plane shake itself apart.
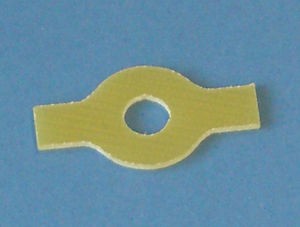
|
| Stop Plate |
I strongly recommend using a front stop plate in addition to the rear plate because on initial motor start-up the blades will often over extend a bit and contact the fuse (in a wing) or horizontal stabilizers (V-tail). This generally results in big chunks of foam disappearing from your plane! The front stop plate should stop the blades slightly past center so that the blades are not actually contacting the stop plate at speed.
The stop plate can be made from thin plywood, G10 fiberglass or even an old credit card. It must be included in the assembly when balancing.
3D Printed Insert
First - A very BIG thanks to RCG poster Noircogi for sharing a really great idea for this printable insert!
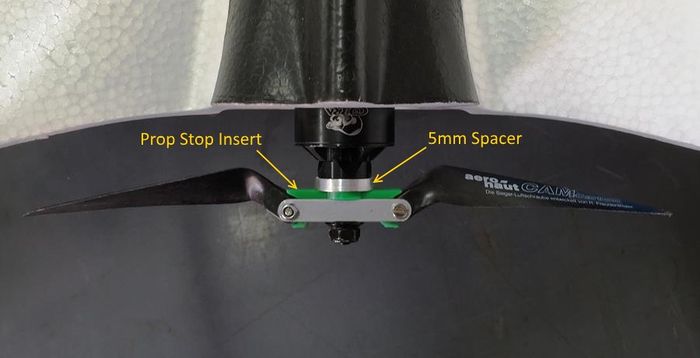
This insert has advantages over the normal trimmed plates. It is a one piece unit that takes the place of both forward and rearward plates, it is light and takes up less space on the prop shaft threads. Also, it provides clearance so you don't have to shave the prop blade hub down.
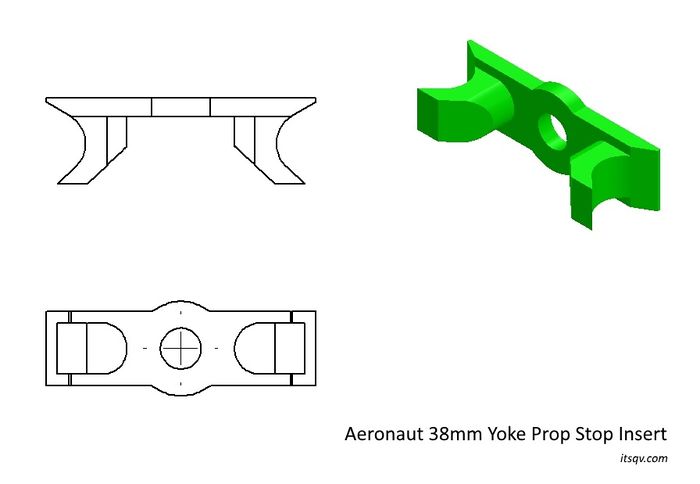
|
| 3D printed Stop Plate Insert for the Aeronaut 38mm Yoke |
|
| Assembled on an Aeronaut 9x7 Folder and mounted on my FX-61 (spacer is optional) |
If you would like to download printable STL files for 5mm, 6mm & 8mm shafts of this part, please click the link below:
Stop Plate Insert 3D STL files
Note: You may need to do a little sanding on the part depending on print quality and material.
Blade Stop Adjustment
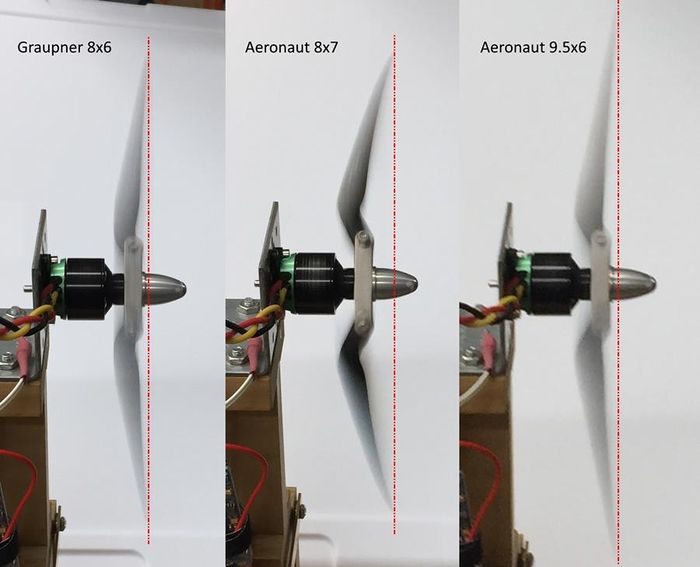
Because every folding blade set is slightly different in shape at the pivot, an adjustment will likely have to be made to insure the blade is extending far enough to get the maximum efficiency and least vibration. As you can see by the picture below, when these props are spinning without stop constraints, they have their own "natural center". The goal then is to adjust the extended stop so that it is just beyond this natural center.
|
| Three different folders with three different "natural centers" |
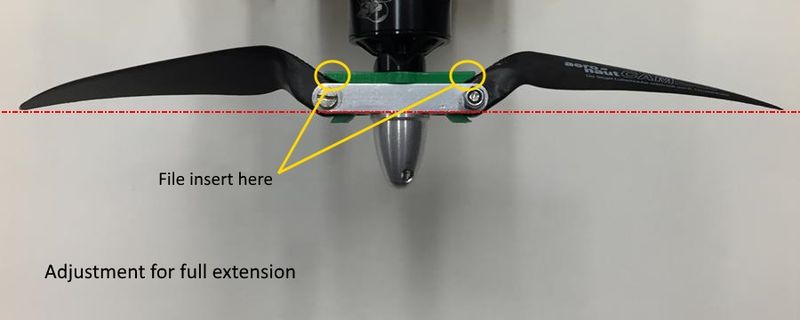
To make this adjustment, file the stop insert in the area shown such that the blade tips are both even and forward of their natural center. In the case of the three props shown, making them even with the yoke edge will always work. This will insure the blades will always extend enough but not too far so as to damage the insert or your plane. Be sure to spin your prop without stops to see where its natural center is and adjust the stops to about 2mm ahead of this point.
|
Options
- 1. If you can't get the 3D insert printed then A front stop plate is needed and always recommended especially if there is very little space between the prop and the airframe when fully extended. It is important to note that these should be trimmed so the blades can go past their natural extended position. Here is a picture of my FX-61 which shows a front stop plate installed.
|
| FX-61 Set-up with two stop plates |
- 2. Alternate Yokes with included collet shaft adapter - While these are available and easy to set-up, they very often cause issues with balancing and do not allow for the use of a front stop plate (if needed).
- 3. Reversed spinner - These also are readily available but can also present vibration issues as well as being heavy and more expensive.
Balancing
First of all, in my experience, Aeronaut props are impeccably made and I have always found them to be very close to perfectly balanced right out of the package. Having said that, balancing a folder can be challenging but there are a few tips which should make it easier and give good results.
I outline my balance method in another How-To, How To - Prop Balancing which is also the second part of my How-To on motor balancing. This section then follows that method but with the following additional preparation Tips.
Make it Flat and Long
- This means, make it like an ordinary fixed prop. To do this, tighten the blade screws just enough to hold the blades flat and straight.
- Next lay it flat on a table or bench so the hub (with stop plates if used) is flat on the surface and the blade tips are just touching the table top.
- With the prop in this position, use a plastic or wooden dowel and gently pry each blade out so it is firmly against the pivot screw in the outward direction. This removes the slack and very closely emulates where the blade will sit while spinning.
- Check that the hub is still flat with the blade tips touching then move the prop to the mag balancer and follow the process outlined in the Prop Balancing How-To.
Now go fly and enjoy a really nice prop upgrade!
See Also
Vendors used for this project
Comments? Questions?