How To - Build a DIY Battery Pack Spot Welder
Redirect to:
|
Introduction
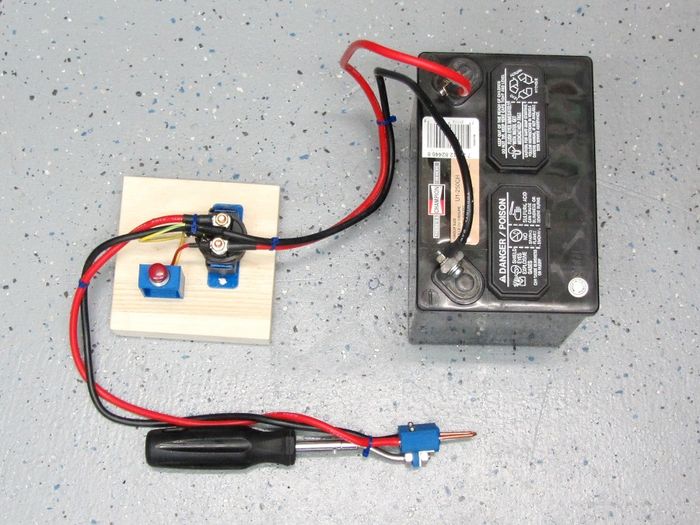
This article and build is based on an excellent write-up on RC Groups by poster Mochanic. So far it has worked flawlessly for me and sure takes a lot of the pack assembly soldering work away!
Parts
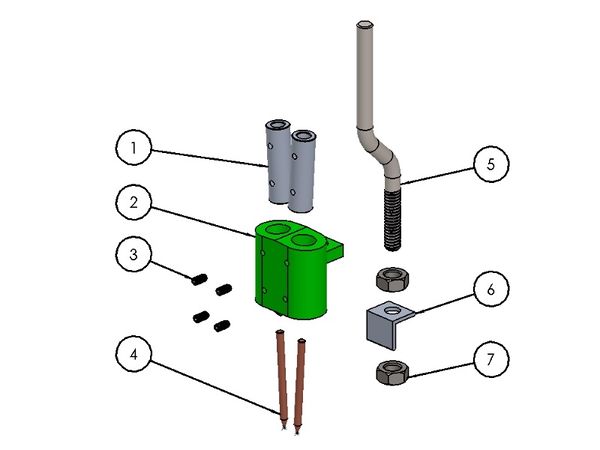
The parts for this build are shown and listed below. The hardware bits are all in imperial measures as this was easiest for me to source and much of it I already had.
|
| Weld head parts |
Weld Head Parts
- 2x - Aluminum Tube, bar stock, 3/8" x 1-1/4"
- 1x - 3D printed Weld Head (STL below)
- 4x - 4-40 x 1/4" set screws
- 2x - Solid Copper nails, .120" x 1.25"
- 1x - Handle bar, 1/4"-20 x 4" bolt
- 1x - 1/16" x 1/2" x 1/2" x 5/8"L Aluminum Angle
- 2x - 1/4-20 Hex Nut
- 1x - 1/4" Bit Driver handle
Trigger Parts
- 1x - ATV Starter Solenoid
- 1x - Momentary Switch, N/O
- 1x - 6" 16ga wire
- 1x - 1-yard AWG8 Silicone Wire, Red
- 1x - 1-yard AWG8 Silicone Wire, Black
- 4x - AWG8 x 1/4"" Ring Connectors
- 4x - 3/8" x 1" Shrink Tube
- 1x - Garden Tractor battery
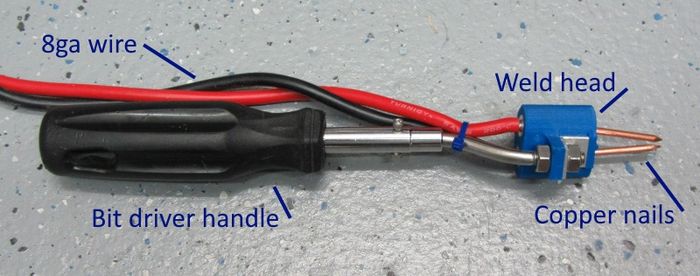
I found an inexpensive (~$4) screw bit driver at the local hardware store which provides the handle as the Handle Bar just slides inside where the bits normally go. I added two 4-40 screws to lock it in place.
|
| Weld head/handle assembly |
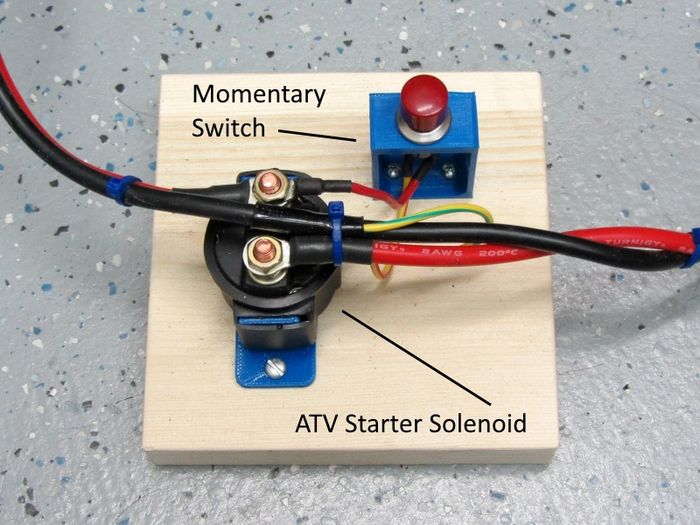
For the Trigger I printed a stand for the switch and a piece to hold the solenoid.
|
| Trigger assembly |

|
| Complete assembly, ready to weld! |
Getting it all together
Here are a few part details:
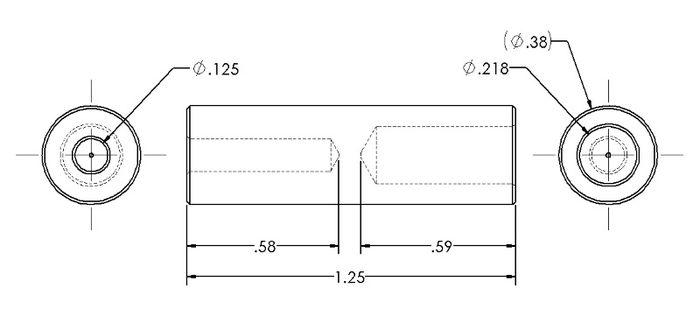
#1 Aluminum Tube
The two aluminum tubes are made from 3/8" Aluminum Roundbar. In my case I have a lathe which makes centering and drilling the holes very simple. Without a lathe a drill press can be used and the hole do'nt have to be perfectly centered. The drill sizes and depths are shown below.
|
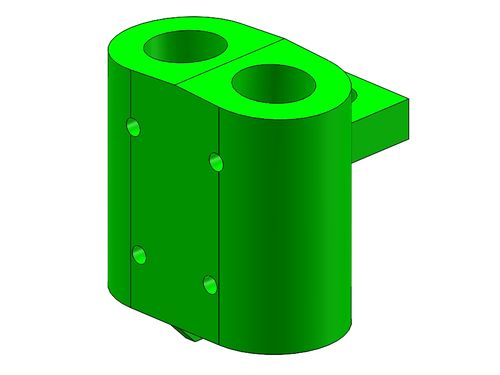
#2 Weld Head (Print)
This 3D part can be made in ABS or PLA. It should be printed with an infil of 70% or more. The two holes for the aluminum tubes are sized to be a firm fit. If the tubes don't push in you can clean the holes up with a 3/8" drill bit.
|
#4 Solid Copper Nails
These you can pick up on ebay. They are .120" in diameter and 1-1/4" long. Simply cut the nail heads off and clean up the cut before attaching to the head.
#6 Aluminum Angle
This piece is optional and is made from standard hardware store aluminum angle. The standard size is 1/16" x 1/2" x 1/2". The cut to length is 9/16" and the hole is 1/4" Dia.
Basic Assembly
- 1. Press the two aluminum tubes into the Weld-Head print making sure the large hole end is toward the top.
- 2. Using the four small holes as a drill guide, drill the four set-screw holes through the plastic and aluminum using a #43 drill bit.
- 3. Tap the four holes with a 4-40 tap.
- 4. Strip and tin the ends of the AWG-8 wire and plug them into the top of the weld head. Add the top two set screws and tighten.
- 5. Add the two copper nails to the bottom holes and tighten their set screws.
- 6. Add the handle bar, 2 - 1/4-20 nuts and the handle.
- 7. Assemble the switch and solenoid and add the battery.
Using the Welder
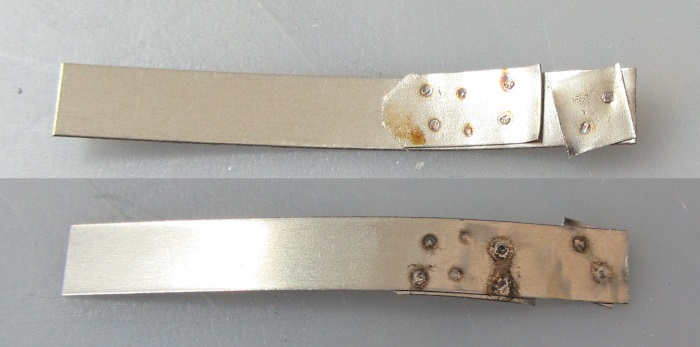
Practice, practice, practice!
Using all the gear shown hear, this is one powerful spot welder! Be careful and practice until you have a method and technique which produces consistent quality spot welds. In my first initial tests, I literally blew holes through the nickel test strips. I finally found that simply banging the momentary switch was enough to produce a complete, solid weld.
|
| Practice! |
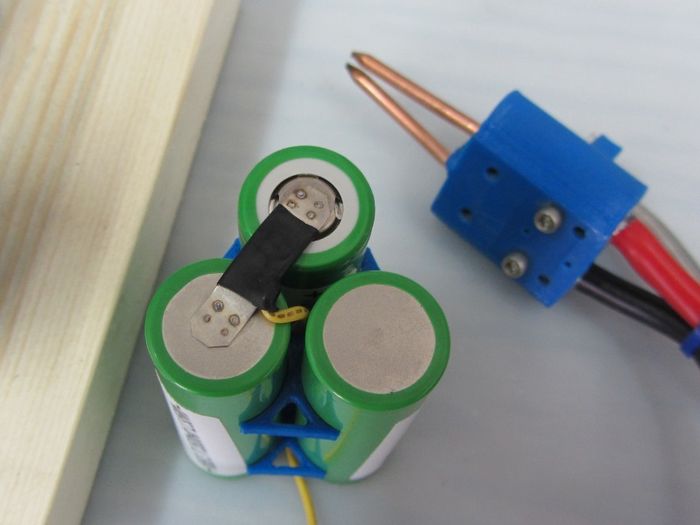
The method I use to hold the handle is to place the two copper nails at a 45 degree angle and gently press the tips down. Once the tips are positioned correctly and stable, I bang the momentary switch and instantly have a spot welded part.
|
Suggested Mods
- It would be a good idea to add a circuit breaker or fuse to the battery lead in the event the switch gets stuck or some other direct short happens.
- The are several Arduino spot welder controllers on-line that would be a big advantage to getting more consistent welds. An example came be found HERE
See Also
3D Print Files
